Best Henna Patterns for Beginners: Top 20 Easy-to-Follow Guides
- sarah makhluf
- Aug 17, 2025
- 5 min read

If you’ve ever wanted to try henna but didn’t know where to start, this guide is for you. It features easy henna designs that are perfect for beginners, even if it's your very first time using a cone. From simple henna designs to basic mehndi patterns for the front of the hand, these easy-to-follow guides make practicing fun and stress-free.
Whether you're preparing for a special event or just looking to try something new, these beginner henna patterns are a great way to build your skills. You'll find a mix of traditional mehndi design styles, royal front hand patterns, and soft, modern looks that are simple yet beautiful.
Ready to explore henna for beginners? These top 20 designs will help you start with confidence.
Floral Finger Tips

How to make it: Use your henna cone to place tiny flower clusters across the tops and sides of each finger. Stick to simple five-dot shapes and keep them scattered. This is a great beginner henna pattern if you want something playful and easy.
Delicate Floral Vines

How to make it: Begin with a few curved lines starting from the fingers and stretching toward the wrist. Add small leaves and rosebuds along each stem. Keep the shapes simple and focus on flow. This easy henna design gives a romantic, natural look.
Lace-Inspired Finger Trails

How to make it: Draw long vertical lines down each finger with lace-like detailing along the sides. Add tiny floral clusters and dots in the center of the palm. This is one of the prettiest, easy henna designs for the front of the hand, especially if you're aiming for a light, detailed look.
Minimal Dot Line Fingertips

How to make it: Use the tip of your henna cone to place tiny dots in a straight line along both sides of each finger. Keep the spacing even and follow the natural curve of the hand.
Simple Fingertip Dot Design

How to make it: Dip each fingertip into henna paste or apply a thick layer using a cone. Then, use the cone or a rounded cap to stamp a filled circle in the center of the palm. Let it sit for a few hours before scraping off for a bold stain.
Palm Tree-Inspired Pattern

How to make it: Start by drawing a long vertical line from the middle finger down to the wrist. Add short, spaced lines across the fingers and knuckles for detail. To form the palm tree, draw a curved top and finish with leaf-like strokes branching out.

How to make it: Use a henna cone to dot out tiny five-petal flowers. Start at the fingertips and work your way down the hand, curving the pattern into a bracelet shape. This is one of the most easy beginner simple henna designs and perfect for practicing dot placement.
Single Finger Leaf Motif

How to make it: Start from the base of the finger and draw small leaf shapes with open tips. Add tiny dots in between each cluster to space them out. This is one of the most simple henna designs for beginners and works well for practicing balance and neat lines.
Cute Henna Bows

How to make it: Use a steady hand to draw two curved loops for the top of the bow, then add two tails underneath. Keep the lines clean and even for the best look.
Palm Garland Pattern

How to make it: Draw curved lines connecting the fingers in an arch across the palm. Add tiny five-petal flowers along each line. Keep each shape spaced evenly. This beginner henna pattern looks delicate but is easy to recreate with a bit of patience.
Mixed Geometric Accents

How to make it: Choose a different shape or motif for each finger—triangles, dots, leaves, and diamonds all work well. Keep each design small and centered, using the finger joints as guides.
Moon and Dot Motif

How to make it: Start by placing a large filled dot in the center of each palm. On the fingers, alternate between tiny dots and open crescent shapes. Keep spacing even for a clean finish. This design is a creative twist on basic henna patterns and makes a great option for henna for beginners who want something modern and simple.
Trailing Rose Hand Design

How to make it: Begin at the wrist with a curved vine and layer rosebuds along the way. Extend the vine across the back of the hand and up each finger with small leaves and petals.
Honeycomb Trails

How to make it: Use a henna cone to create small, evenly spaced hexagon or brick-like shapes in a winding path. Follow the curve from the wrist up to the fingers and stack the shapes close together for a clean pattern.
Striped Finger Bands

How to make it: Start by drawing evenly spaced horizontal lines across the fingers. Fill some bands with leaf shapes and others with dots or curved strokes. Add small dot clusters between the joints for extra detail. This easy beginner simple henna design is great for practicing symmetry
Bold Floral Grid

How to make it: Use a henna cone to create evenly spaced flower shapes in rows across the back of the hand. Keep the size and placement consistent for a neat, uniform look.
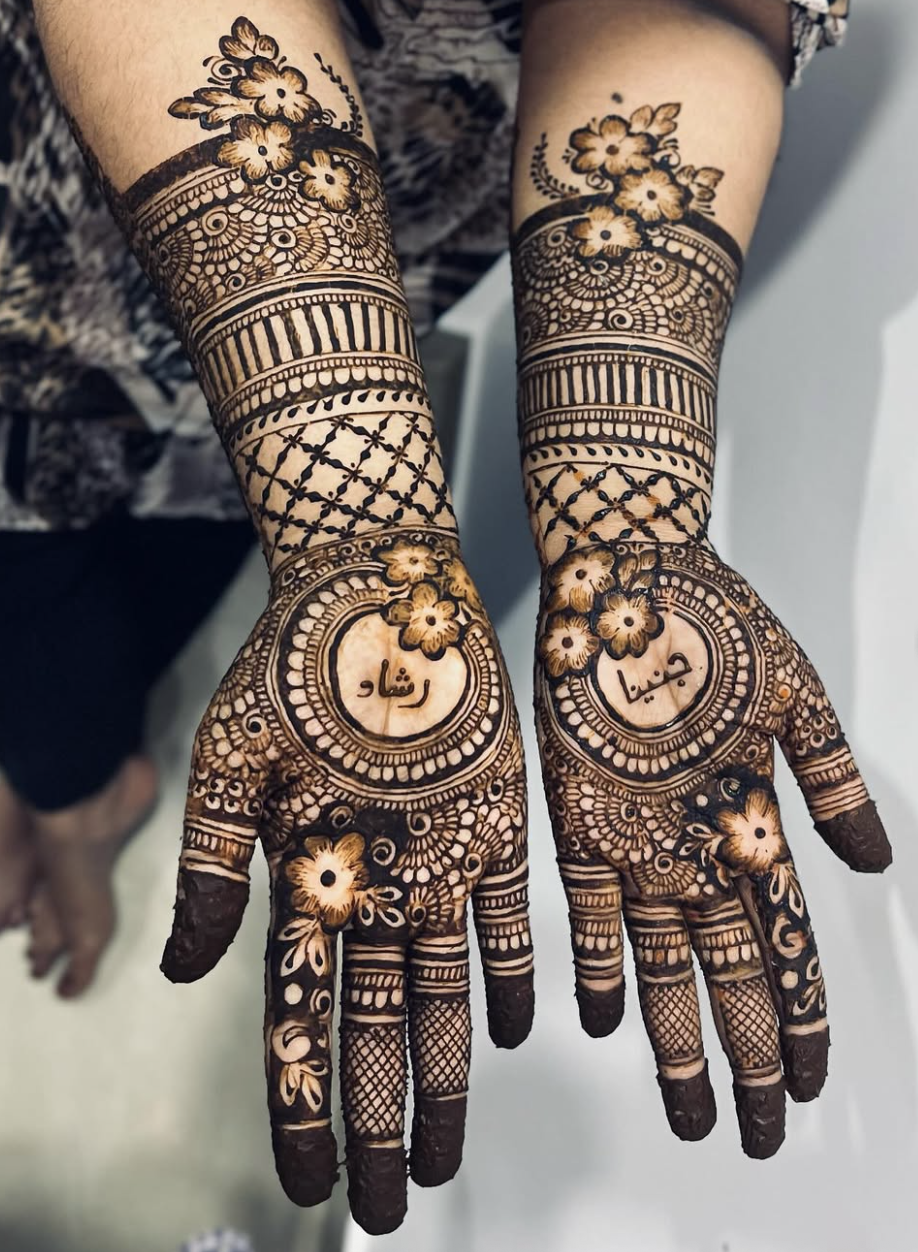
Lotus Mandala & Rings

How to make it: Start with a centered lotus flower on the back of the hand. Add layered circles around it with dots, lines, and scalloped edges to form a mandala. Then decorate the fingers with stacked lines, dots, and small pointed motifs.
Tiny Doodles & Dashes

How to make it: Use a fine-tipped cone to draw tiny dots, triangles, lashes, and hearts across each finger. Keep the spacing tight and shapes simple. This is a fun and quirky option for anyone exploring easy beginner simple henna designs, especially if you want something small and creative for everyday wear.
Star & Moon Scatter

How to make it: Use your cone to alternate small crescent moons, four-point stars, and tiny dots across the back of the hand and fingers. Keep the layout loose and balanced. This is one of the easiest beginner henna patterns to freestyle and works beautifully as a simple henna design for any occasion.
Square Motif with Script
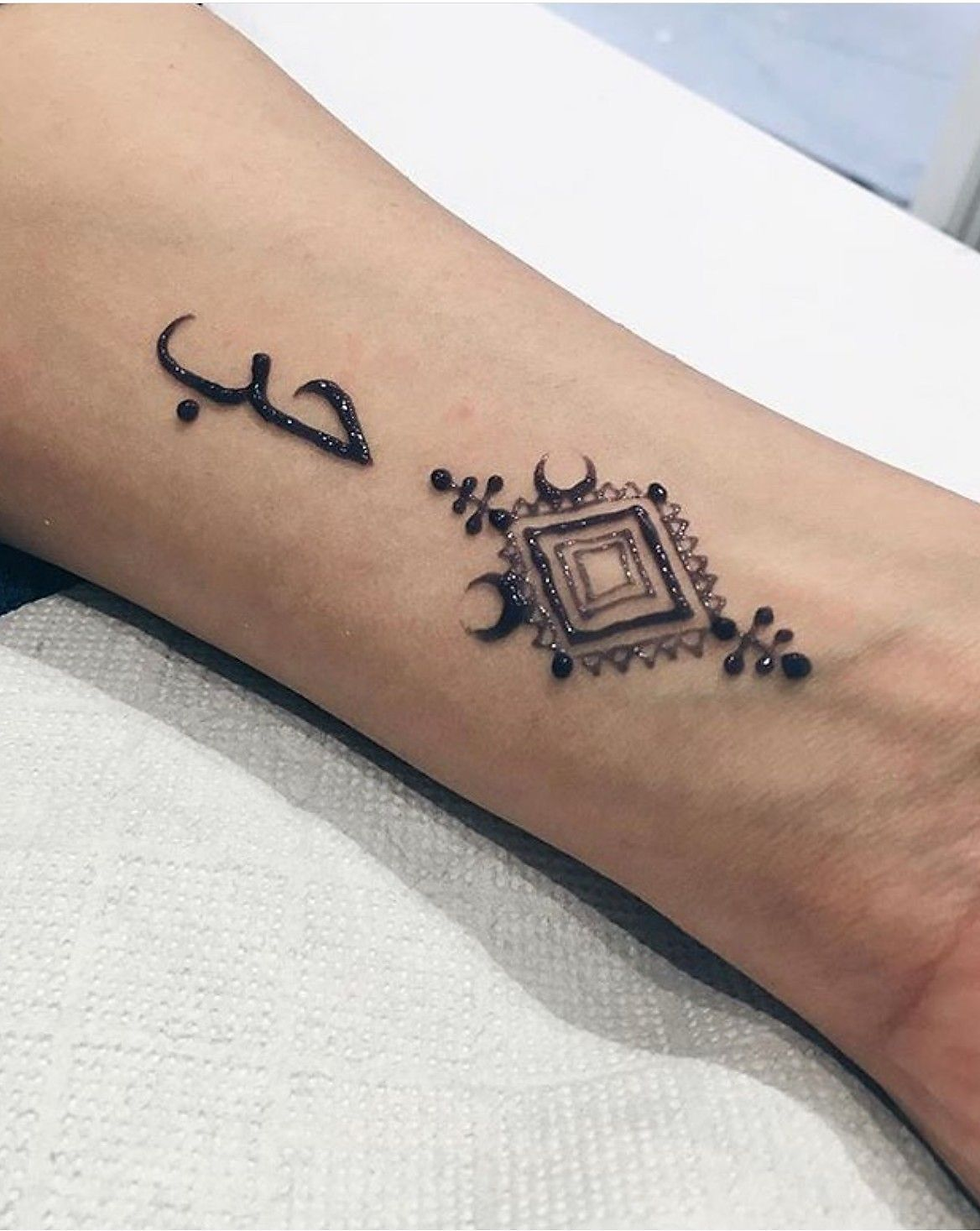
How to make it: Start with a series of stacked squares in the center, then frame them with dots, crescents, and triangles. Pair it with a short word or symbol in Arabic or your native language!
Learning henna doesn’t have to be complicated. These beginner-friendly designs show that even simple dots, lines, and shapes can create beautiful results. Whether you’re experimenting with floral patterns, geometric accents, or fun little doodles, there’s no right or wrong. Use these easy henna designs as a starting point and enjoy the process of developing your own style.
Ready to try your first cone? Pick a pattern you love and start practicing!